Water Heater Basics

Water heaters are one of your home’s most important appliances, yet they’re often overlooked. That is, until you run out of hot water while showering or washing clothes. Click here to Learn More.

Tankless models eliminate this problem by heating water on demand. They require more upfront investment but save you money in the long run.

water heater

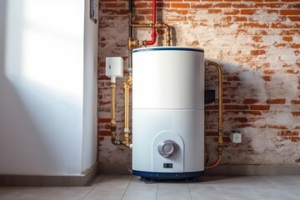
A traditional tank water heater (the big metal cylinder in your garage or laundry room) uses gas or electric energy to heat a set amount of water at one time. It then stores the hot water until it’s needed. There are a number of different components inside your tank that help it work as efficiently as possible.

The tank itself is made of a heavy steel outer layer that encloses a glass or plastic layer on the inside to prevent rusting. At the bottom of the tank is a gas burner assembly that burns propane or natural gas to create the hot water. The burner is controlled by a valve and thermostat that ensure the burner fires when your household demands it.

Water travels from your home’s main water line into the heater tank through a dip tube that sits at the base of the tank. From there, the heating mechanism inside the tank heats the water to your preferred temperature setting. As the water gets hotter, it floats to the top of the tank. A hot water discharge pipe is fitted at the top of the tank to funnel off the hottest water for use around your house.

Outside of the heater tank is a drain valve that’s used to allow you to easily empty sediment from the tank. There’s also a shut-off valve that’s located on the tank itself. This allows you to turn off the flow of water into the tank, for instance, when making repairs or moving the water heater to a new location. A pressure relief valve is wire-welded to the top of the tank as well. This safety device releases excess pressure built up in the tank due to high temperatures or excessive gas usage.

A thermostat is a device used to control the operation of climatic equipment such as an electric heater or water heater. There are many different types of thermostats based on purpose, method of control, installation method and power source. The two most common are mechanical and electronic.

A mechanical thermostat consists of a strip or coil of metal that is sensitive to temperature changes. As the temperature rises, the piece of metal will expand and break a circuit. This will then activate the switch that controls the heater or air conditioning system.

These types of thermostats are typically used to regulate a gas-fired heater via an electric gas valve, but can also be connected to a wide range of other heating devices including electric baseboard heaters, oil furnaces, boilers and hot water heaters. Thermostats can also be combined with cooling systems to control both heating and cooling equipment simultaneously.

Modern digital thermostats are far more sophisticated than their older mechanical counterparts. They usually feature LCD screens which display the current temperature and allow for finely tuned setting of both a day and a time schedule. Some even have a built-in clock and calendar to help control energy consumption and efficiency.

In some cases, an anticipator is included with a thermostat to shut off the heater before the house reaches the desired temperature. This is especially useful for large homes or buildings with a lot of windows. Unlike a pilot light, which wastes a significant amount of gas over long periods of time, an anticipator is not as expensive to operate.

To ensure accurate readings, a thermostat should be installed in an area of the house that is insulated from drafts and outside temperatures. It should be out of direct sunlight and away from any heat sources such as fireplaces, radiators or cooking appliances. It should also be located in a room with a constant flow of fresh air. Ideally, this should be in a shared space such as a living room or bedroom. Alternatively, a central hallway may be appropriate as it is less likely to be affected by the temperature variations of individual rooms.

The drain valve might seem like a small and insignificant part of the water heater, but it plays a crucial role in maintaining efficiency and extending lifespan. This little valve is designed to release excess pressure from the system, preventing it from overflowing and causing costly damage. A drain valve is used in a variety of systems, from household radiators to industrial machinery. In fact, there are many types of these valves in the market today. Each is designed to meet specific requirements and serve different functions.

A typical drain valve consists of a hollow body with a stem that sits perpendicular to its axis. The valve is opened when the stem is turned, allowing liquid or gas to flow through the body. Once the stem is turned off, the path through the valve is blocked. The stem can also be used to raise or lower a gate that blocks the flow of liquid or gas, thereby changing the direction in which the fluid travels.

To open a plastic drain valve, first work on the standard safety procedures by shutting off power and water supply. Then, place a pail below the drain valve to catch the water and prevent any mess. You can also place a garden hose to the end of a drain pipe to direct the flow of water towards a drainage area, such as a lawn or plant bed.

If you prefer a simpler solution, an electronic drain valve is available for your air compressor system. This drain valve features a solid-state timer, solenoid valve, and protective housing. This unit is powered by DC current and has a voltage range of 100-240 VAC. It also has an operating temperature range of -40 to 120 degrees F. Some of these units are insulated with Grade F or Grade H, providing greater heat resistance and a longer lifespan.

A zero-loss drain valve, on the other hand, is powered by a sensor probe that monitors the water level in the tank. When the water rises to a certain level, the sensor transmits an electrical signal to a solenoid valve to open and close at specified intervals, balancing drainage with air loss.

Hot water is one of the great conveniences of modern life. It makes all sorts of household chores easier and more pleasant. However, it is easy to take its utility for granted until you experience a cold shower or run out of hot water for laundry.

The water heater is a large metal tank that usually sits in the garage or basement of your home. It is heated using either gas or electricity to maintain a steady temperature of 120-140 degrees Fahrenheit. The water is then kept at this level until it is needed for a shower, washing clothes or other household uses. When it is needed, the thermostat signals the unit to heat the water. The water is then pushed out of the unit via pipes to your plumbing fixtures.

If you have a gas water heater, you have the option of choosing a conventional model that looks like a big metal cylinder or a more energy efficient condensing unit. The former operates using a flame under the tank to heat the water and then stores it until you need it, while the latter utilizes a heating element to heat the water as it passes through your pipes.

Both types require a gas line to operate. If you’re installing a new gas water heater, the installation of this gas line is an important consideration. You will need to decide if you want the unit to be connected to the natural gas network or use propane.

A new gas line needs to be properly installed for a safe and reliable operation. This is why you should consult a professional to do the job. They will ensure that all of the connections are tight and secure, and that you have the right size line for your home.

You should also check for leaks on a regular basis. To test for any leaks, turn off the gas and swab each connection with a mixture of 2 tsp. dishwashing liquid to 1 cup of water or a commercially prepared leak testing solution. Watch for bubbles to form at each joint and then repair or replace them as necessary.

How to Keep Your AC System Running Properly

Pro Master Heating & Air Conditioning will help keep your cooling system running at peak efficiency for years. The best way to do this is to schedule regular maintenance appointments.

When your technician arrives for a maintenance appointment, they will start by checking for clogged fans and a dirty air cabin filter. They will also check for refrigerant leaks.

ac repair

A thermostat is a very important part of any air conditioning system. It sends signals to the ac unit and other major appliances in your home so they can function properly. If you have a broken thermostat, your house will be uncomfortably hot or cold, and it will use more energy than necessary. This can also cause serious damage to your system and lead to expensive repairs later on down the road. Fortunately, there are several easy ways to check if your thermostat is working properly without calling in an expensive professional.

The easiest thing to check is whether the thermostat is showing the correct temperature on its screen. If it isn’t, the batteries may have died, or there could be a problem with the thermostat itself. This is easily fixed by changing the battery. If the problem persists, it is time to call in a professional.

Another common AC repair is a weak flow of cool air from your vents. This can be caused by a number of different issues, including clogged filters, a malfunctioning fan, or problems with the ductwork. If you have a clogged filter or a fan that isn’t running, the airflow will be limited, and you won’t be getting as much cool air as you need.

When you are experiencing a lack of cool airflow, the first thing to do is check your thermostat. If the airflow is still poor, it’s likely due to other factors, such as low refrigerant levels or a malfunctioning compressor. A professional will be able to diagnose these problems and recommend the proper AC repair.

If the airflow is good but the temperature isn’t being maintained, there is most likely a problem with the ac unit itself. A professional will be able to use diagnostic tools such as pressure testing and bubble test to identify the issue. In some cases, they will need to replace parts or the entire unit. In addition, a professional can help you with maintenance tasks such as cleaning the coils and checking for refrigerant leaks that can be costly to fix if left untreated.

One of the most common causes of AC issues is a dirty filter. If the air flow is restricted by dust, it can cause the unit to overwork and heat up. This is why you should regularly inspect, clean, or replace the filters to ensure your system is operating properly.

To do this, start by shutting off power to your system. This can be done at the thermostat, breaker box, or at the shutoff switch located on or near your indoor unit (which usually looks like a light switch). Once you have turned off power to your system, locate the air filter. It’s likely to be in the return vent, which is the vent that pulls air from your rooms back into the central system. It may have a label on it or be inside a metal panel with hooks or screws to open. A screwdriver with the appropriate head type can help you remove it. When you take out the old filter, look at it for a sign that it is time to change it. If caked on dirt or dust can be seen easily, this is a good indication that it’s time to change the filter.

Once you have removed the old filter, carefully replace it with a new one. Make sure to check the arrows on the filter to ensure it is placed in the correct direction. Also, note the size of the filter to be able to purchase a replacement at your local hardware store.

You should be able to find several different types of filters, including high-efficiency, low-emissions, and allergen-removal options. Depending on your needs and your home environment, you can decide which filter will best meet your requirements. You will want to keep in mind the MERV rating, which is an industry standard that measures efficiency. A higher MERV rating will require your system to work harder, but you’ll get more airflow out of it. For the most efficient and reliable results, you should choose a middle-of-the-road MERV rating. This will provide good quality and good airflow without putting too much stress on your system.

A failing compressor can be the cause of many different problems. Typically, a technician will perform a few simple tests to determine whether or not the compressor is at fault. These tests include visual inspection, a compressor clutch test, and a multimeter test of the compressor terminals.

First, the technician will inspect the compressor for damage and corrosion. If any damage or corrosion is observed, the compressor may need to be replaced. The next step is to examine the wiring on the compressor. This will include checking for signs of fraying or burning insulation, as well as making sure that the wires are properly connected to the plug. Finally, the technician will perform an electrical resistance test of the compressor. This test will use a multimeter to measure the resistance between the common, start and run windings. Ideally, the resistance should be below 30 ohms.

This is one of the most important tests that a ac repair technician will do. The technician will put a red pin on the terminal C and a black pin on the terminal R, while using the multimeter in the continuity setting. If the resistance is significantly higher than 30 ohms, it could indicate that the compressor has open windings. The technician will repeat the test after the compressor has cooled down to ensure that the readings are accurate.

When performing this test, the ac repair technician will also listen to the compressor for unusual noises. Unusual noises like grinding, squealing or rattling may indicate internal mechanical issues with the compressor. The ac repair technician will then consult the compressor manual to determine the best course of action for the compressor.

In addition to a visual inspection and an electrical resistance test, a ac repair technician will also check the oil for moisture and acid. They will also take a sample of the refrigerant to make sure it is in good condition. In addition, they will check the fuses and circuit breakers to make sure they are working properly. If the fuses or circuit breakers keep tripping, there is probably a problem with the compressor.

A properly working air conditioning system depends on a variety of components, including the ductwork that transports temperature-controlled air from the AC to different rooms in your home. Problems with ducts can cause uneven cooling, high energy bills, and dust accumulation around vents. If you notice any of these problems, it’s time to call an ac repair technician for service.

You can often spot signs that your ducts need repair by looking for holes and leaks. An HVAC professional can use special testing equipment to determine the extent of the duct leakage, but you can also perform a simple test at home. Turn on the HVAC system and slowly move a smoke pencil or incense stick along your ductwork. If the smoke moves or disappears, it’s a good indicator that there is a hole somewhere in your ductwork and that air is escaping it.

If you find insects or rodents in your ductwork, that’s another telltale sign that it is time to get it repaired. These pests often enter ducts through holes and cracks. They can contaminate the air with their urine and feces, which can lead to a wide range of health problems. Fortunately, you can usually prevent this problem by replacing old or damaged ducts with new ones that are tightly sealed and insulated.

Other common warning signs that it’s time to get ductwork repaired include uncomfortably cold or warm spots in your home, a musty smell coming from vents, and high utility bills. You can seal minor leaks in your ductwork with metal foil tape, but you should have an HVAC technician examine and repair extensive or damaged sections of your ductwork.

If you are worried about the cost of AC repairs, consider asking your installer if they offer financing. While you may have to pay interest, it’s often much less than the cost of a personal loan from a bank or credit union. You can also try to negotiate a lower rate with the contractor, which may make it easier for you to afford your needed repairs.

How to Get the Best Plumber Maintenance for Your Home

Duct tape can fix many things, but plumbing problems require Hubbard Mechanical. When looking for a plumber, check out their qualifications and rates before deciding.

The best plumbers are licensed and have years of experience under their belts. They also have strong customer service skills and a keen eye for detail.

plumber

Water leaks are one of the most common plumbing issues that can lead to a lot of damage in your home. It’s important to address any leak right away before it gets worse.

Leaks that are left untreated can cause extensive damage to your walls, flooring and soft furnishings. They also increase your water bill because leaking water uses up your water supply. You may even notice a difference in your water pressure. This is why it’s essential to conduct regular inspections and maintenance. A plumber can check for leaks and fix them before they become an issue.

A good plumber will be able to detect and repair any leaks in your home, including hidden leaks that can be difficult to find. You can also help to prevent water leaks by taking some simple steps. For example, if you notice any water spots on your ceiling or wall, turn off the water supply to that area of your home. This will stop the flow of water and allow you to clean up the spot before it gets worse.

It’s also a good idea to keep an eye out for other signs of leaks, such as damp areas, musty smells near drains and changes in your water bill. If you notice any of these symptoms, contact your plumber immediately to avoid further damage and expensive repairs.

Many people think that small leaks won’t cause any harm, but they are wrong. Leaking water will corrode your pipes over time and can cause them to crack or burst. This can lead to expensive repairs and replacements for your home.

While a lot of leaks will rise to the surface, there are some that can remain underground for a long time. These types of leaks can be difficult to identify, especially if they are located beneath your house. A professional plumber can use sound amplification equipment to locate and fix these types of leaks.

While a lot of leaks are caused by wear and tear, some can be the result of neglect or bad habits. It’s important to keep an eye out for any problems with your plumbing and have it checked regularly.

The presence of mold and mildew in your bathroom isn’t just unsightly — it can also pose health risks. These fungus growths release harmful spores into the air, compromising indoor air quality and putting your family’s well-being at risk. Exposure to these spores can lead to respiratory problems such as coughing, wheezing, sinus congestion, and itchy skin or throat.

Mold growth often results from underlying plumbing issues, such as leaks, water accumulation, and inadequate ventilation. Fortunately, plumber maintenance services can prevent and address these issues before they lead to mold.

Keeping an eye out for signs of mold growth, such as discoloration or peeling paint near pipes or fixtures, is the first step in identifying these issues and ensuring they’re promptly repaired by a professional plumber. In addition, addressing leaks and maintaining proper drainage reduces moisture levels in the home, which prevents mold from growing.

Leaking pipes are one of the leading causes of mold growth in homes. These hidden leaks often occur behind walls and underneath floors, where they’re difficult for homeowners to detect. When mold growth occurs, the affected area must be inspected by a professional plumber to determine the source and extent of the leak.

Other causes of mold growth include clogged drains and sewer backups, which create a damp environment that encourages the growth of mold. Frequently cleaning drains can help prevent clogs and prevent the excessive moisture that can promote mold growth.

Poor ventilation in bathrooms and kitchens can also lead to the formation of mold, which must be addressed by a professional plumber to ensure adequate indoor air quality. Incorporating exhaust fans and ensuring that vents are properly cleaned and maintained can help minimize the amount of moisture in the home, which will prevent mold from growing. In addition, insulating exposed pipes can help reduce condensation and the risk of leaks. By implementing these prevention and maintenance measures, you can avoid the costly consequences of mold growth, including water damage, structural damage, and negative health effects. Taking the time to perform routine plumber maintenance is a small investment that can help you avoid these consequences.

When water pipes become damaged, it can lead to a host of plumbing issues that require immediate attention from a plumber. Whether it’s a leaking pipe or a burst one, there are certain steps that need to be taken to minimize damage until a professional can get to the scene. For instance, if you suspect that a pipe has broken, the first thing you should do is turn off your home’s water supply. This can be done by turning the main shut-off valve. It’s likely located near your water meter or where the main line enters your house. Turning off the water will help reduce any further damage until a professional can arrive.

Other signs that you may have a burst pipe include noticing discolored water, finding puddles of water in your home, or seeing an increase in your water bill. In some cases, a plumber can fix the issue with simple repairs, but more serious problems might need to be addressed with replacements or full repairs.

Damaged pipes often happen as a result of poor maintenance and minimal or no regular plumber inspections. However, there are other factors that can contribute to the breakage of a pipe, including extreme weather conditions, soil erosion and even ageing. Additionally, the damage to a water line might cause the mix-up of clean and contaminated water.

Pipes made of copper tend to be more durable than other types, but even they can suffer from damage. This is mainly because they’re subjected to extreme temperatures, high pressure, and moisture levels in the soil. Over time, this can wear out the joinery and even cause them to shift, which leads to leaks in the underground pipes.

There are several ways to prevent damage to your pipes, including using a water pressure regulator to keep the pressure at a safe level, avoiding putting grease or oil down your drains, and having a plumber inspect and clean your pipes regularly. Another preventative measure is installing a backflow prevention device, which can help to keep unwanted particles from entering your home’s water supply.

Many people use natural sources of water for bathing and drinking, such as rivers, lakes and oceans. These natural sources may have a variety of contaminants including pathogens, heavy metals, fertilizers, chemicals and animal and human waste. Consuming contaminated water can lead to illness including diarrhea, stomach cramps, vomiting and respiratory problems. A plumber can perform routine water quality inspections to identify and correct any issues that may be causing a health risk.

Corrosion in pipes can result from poor water quality and ageing plumbing fixtures. A plumber can help ensure that your plumbing is not corroded and will last longer by conducting regular maintenance and inspections.

Inadequate plumbing maintenance can allow sewage to backflow into your home. This can be a dangerous health issue as raw sewage contains harmful microorganisms that cause illnesses such as gastroenteritis. A plumber can identify any leaks or clogs that are allowing sewage to enter your home and provide repairs as needed.

Plumbing emergencies such as broken pipes, sewage backups and water heater failure can be expensive to fix. However, if you schedule regular maintenance, a plumber can detect potential issues before they develop into an emergency and save you money in the long run. A plumber can also provide advice on how to prevent these issues from happening again in the future.

Plumbers can also reduce their environmental footprint by encouraging home owners to conserve water and install energy efficient appliances. This can help save a significant amount of money on utility bills while helping to protect the environment.

Leaks, water damage, and a lack of proper hygiene are just some of the risks associated with untreated water. By investing in routine plumbing maintenance, you can protect your family’s health and the environment. By identifying and repairing any potential issues, you can help to keep your family safe and happy. Water conservation practices also help to reduce the need for expensive plumbing repairs and replacements. So, why not start implementing these simple changes today?

Airconditioning Tips For Everyone

ac cleaning

Aside from the coils, it is recommended to clean the drip pan, drain line and filter regularly. For the drip pan, empty it and use a wet/dry vacuum or cloth to remove standing water and any debris that has collected inside.

To clean the drain line, open the PVC cap and remove any clogs. Then, rinse the drain line with warm soapy water and allow to dry completely.

Clean the Condensate Drain

The air conditioner drain line is responsible for releasing excess moisture that builds up inside of the unit. When this line becomes clogged, the system may shut off as it cannot release the excess water properly.

If this drain line is not cleaned regularly, it can also become a breeding ground for mildew and mold. As a result, it is important to clean the AC condensate drain at least once a year before starting up your cooling system again. Fortunately, this is a fairly simple DIY task that can be completed in just a few minutes.

To begin, you will need to locate the drain line itself. This is usually a PVC pipe near your outdoor air conditioning unit that connects to a drain pan. Make sure to use dry rags to remove any excess water from the drain pan before proceeding with the cleaning process.

Once you have located the drain line, you will need to remove the cap from its top. Take a look at the drain and try to find any obvious blockages such as hair or dirt that could be causing the problem. If you are unable to see any visible clogs, it is possible that you will need to take out the drain snake and attempt to break up the clog manually.

A good alternative to using a drain snake is to simply pour some vinegar into the drain. Vinegar will help to kill off any lingering bacteria or mold and can easily be rinsed away with a little water afterwards. After pouring in the vinegar, allow it to sit for about 30 minutes before flushing the line with water.

Another option is to blow out the drain line with compressed air. This is a great option if you don’t have a wet-dry vacuum and can be done with a bicycle pump or an air compressor. Just be careful not to apply too much pressure as this can cause the drain line to leak. If you are unable to remove the blockage with either of these methods, you will need to use a wet-dry vacuum or cut into the PVC piping and perform a more thorough cleaning.

Clean the Coils

Keeping the coils of your air conditioner clean is one of the most important preventative maintenance tasks you can do to keep it running efficiently. A dirty coil limits air flow, reduces efficiency and shortens the life of your AC unit. It also leads to a higher risk of expensive repairs, and makes your home less comfortable. Cleaning the coils can be an intimidating job, but it’s not difficult if you know how to do it.

The first step is to shut off power to the air conditioning system. Find the breaker near the indoor air handler or outside condenser and turn it off. Next, remove the top and side covers of the outdoor air conditioner and vacuum the coils to remove any dirt and debris. It’s best to wear gloves and eye protection while working with the coils to protect yourself from sharp edges and bent fins.

Once the coils are vacuumed, use a soft brush to remove light dirt buildup. Avoid brushes with hard bristles as they can damage the delicate coil fins. Once the dirt is removed, spray the coils with a non-toxic cleaner. There are several products available that are designed specifically for air conditioners, and there are even specific formulas for evaporator and condenser coils. The cleaning solution can then be rinsed off with a garden hose.

Be sure to check your AC manufacturer’s warranty before self-cleaning the coils. Many warranties require you to have the coils cleaned by a professional at least once every year. In addition to protecting your AC unit’s warranty, regular coil cleaning will ensure that your house stays cool and comfortable while saving money on energy bills. With a little time and effort, you can keep your air conditioner working like new for years to come. This is why it’s a good idea to learn how to clean the coils yourself as part of your preventative AC maintenance. This can save you hundreds of dollars in energy costs over the lifetime of your air conditioner. It’s a worthwhile skill that you can easily learn to improve your home comfort while saving money on your energy bill.

Clean the Filter

Whether you have a whole-house system or a window unit, an air conditioner needs a filter to trap and collect dust, dirt, and other particles before they can circulate through your house. A dirty filter can cause the ducts to overheat and damage the unit, so it’s important that you clean it regularly. Here’s how to do it:

Start by vacuuming the filter with a handheld vacuum or a vacuum cleaner attachment. This should remove most of the visible dust and grime. If the filter is still clogged with debris, you can clean it by submerging it in a sink filled 50:50 with water and white vinegar. Allow the filter to soak for about an hour, then rinse with fresh water. Allow it to dry completely before replacing it and resuming airflow.

The best way to ensure that the filter is cleaned properly is to follow the manufacturer’s instructions. Some filters may need to be replaced rather than cleaned, so read the manual to make sure you’re using the correct method.

You can also use a garden hose to wash the filter, but be careful not to use a high-pressure nozzle as this could damage the filter. Once the filter is dry, it’s ready to go back in the duct and start working its magic! Be sure to set a reminder to check and clean the filter monthly or more often as needed, depending on the level of pollution in your area or the nature of your hobbies. This will help keep the air in your home breathable and your energy bills low!

Clean the Remote Control

While we may not realize it, remote controls can collect a lot of bacteria on their surfaces, especially since we touch them so often with fingers and hands that aren’t exactly sparkling clean. That’s why it’s a good idea to give your air conditioner remote control and all your other high-touch devices (think TVs, media players, etc) a regular, disinfecting cleaning—especially in light of COVID-19.

To start, remove the batteries from your air conditioner remote and use a soft cloth to wipe off dirt and debris around the buttons. For tougher spots, spray a microfiber cloth or cotton swab with a mixture of equal parts water and rubbing alcohol and work it into the crevices.

Make sure the sensors on both your air conditioning unit and the remote control are free of dirt, which can prevent the remote’s signal from being received by the sensor on the unit interface. You can also try sliding open the back of the remote and rearrange the batteries (making sure the flat end of the battery is against the spring and the nobbly bit is against the metal contacts) as that’s another common reason for the air conditioning remote not working.